So, you’ve done it. You’ve heard all the hype, mulled it over for a while, and finally purchased a camping hammock. Great! You’ve taken the first step towards convenient comfort along the trail. The next time you escape to the wilderness, you’ll be able to set up your camping hammock and enjoy some of the most peaceful relaxation of your life.
Whether you’re a seasoned camper or not, this might be your first experience with a camping hammock. Never fear. Setting up your camping hammock is quick and easy to learn, and this guide will walk you through it. If you’re used to the difficult, frustrating process of putting up a tent every time you camp, then using your hammock will seem like a piece of cake. With this handy setup guide, you’ll be a camping hammock expert in no time!
Step 1: Pack Essential Gear
First, make sure you pack all the essential gear. Every camping hammock typically comes with its own set of tree straps and aluminum wire-gate carabiners, so you have everything you need for a successful setup.
If you have a hammock rain fly to keep out the elements or a hammock mosquito net for protection against insects, make sure to bring those as well. These accessories can greatly enhance your camping hammock experience, so think twice before you hit the trail without them!
Step 2: Choose the Right Trees
Once you’ve chosen a general area for your campsite, find two sturdy trees that are about 14-15 feet apart. As you become more experienced, you can choose a slightly shorter or longer distance depending on how loose or taut you prefer your hammock, but 14-15 feet is the “sweet spot” and the best place to start.
Be careful not to choose trees that are thin and flexible or that are dead and dry-rotted—unless you want to end up crashing to the ground in the middle of the night!
It’s also a good idea to make sure the trees you choose aren’t home to too many annoying insects, like ants or bees. Finally, pay attention to whether or not you’re on even ground and how that might affect the way you should hang your hammock.
Step 3: Attach Tree Straps
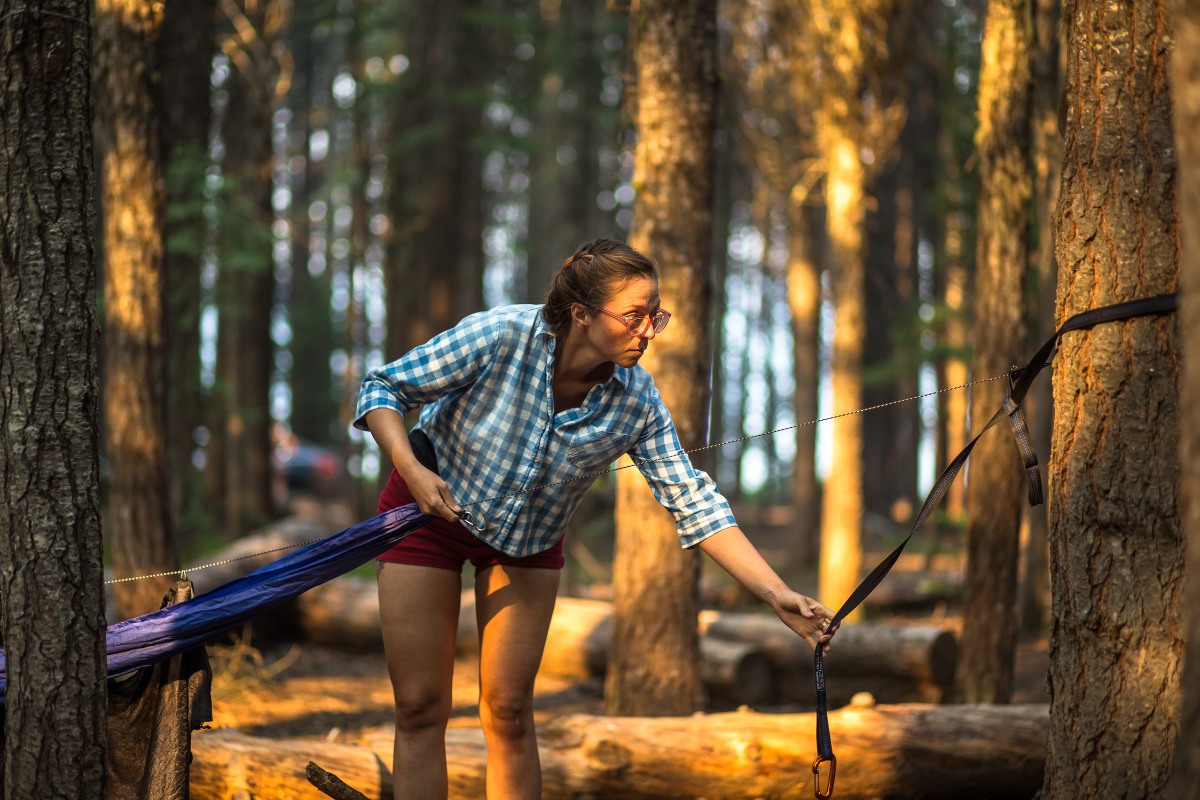
The next step is to attach your hammock tree straps to the trees. Hammock tree straps are not only one of the easiest ways to set up a hammock, they’re also the best way to avoid damaging the trees’ bark. These trees are holding you up all night long, so show your gratitude and leave no trace by using tree straps carefully and correctly.
You’ll want to fix your tree straps at about eye level, but err on the side of higher. If you don’t get the positioning quite right, don’t worry—they’re easy to adjust. Fully unpack and extend one of your tree straps. You should notice a fixed loop on one end of the strap and multiple attached loops at the other end. Wrap your tree strap around the tree once, then slip the first loop through an appropriate attached loop and pull it taut, so that the multiple-loop end is flat against the tree and the other end of the strap is hanging freely.
Once it’s tight, pull the hanging end in the opposite direction from the fixed end and begin wrapping the strap around the tree. You’ll eventually reach a point where you cannot wrap the strap all the way around the tree trunk again. Pass the hanging end through one of the other loops one more time to secure your strap. Repeat with your second strap on the other tree, and that’s it!
If you hang your hammock and find that it’s just a little too low to the ground, you can pass the hanging end through the loop a few more times to shorten it. If your hammock is way too low, you might need to move your tree straps up the trunk a few inches.
Step 4: Hang Your Hammock
Now the fun part: Hanging your hammock! This is the last and easiest step, so you’re almost ready to stretch out and relax. Begin by unpacking and shaking out your hammock.
In general, it doesn’t matter which side you hang as the top, bottom, head, or foot, but pro tip: If you make sure the attached stuff sack is accessible, you can stow necessities like your glasses or even a small flashlight in there so you can find them easily in the night.
Attach the wire carabiner at the end of your hammock to the hanging loop of your tree strap, making sure that the carabiner is fully closed and positioned correctly (loop and cord at the ends, not somewhere in the middle). Do the same with the opposite side, adjust as needed, and you’re all set!
Some Hammock Hanging Tips
- While there’s no need to pack a protractor with your camping gear, you’ll want to aim for something in the neighborhood of a 30° angle between the hammock/straps and the tree trunk.
- You don’t want your hammock to be pulled taut between the two trees. The sag or curve of the hammock is what makes it comfortable! The distance between the ends of the hammock when it’s hung properly is called the “ridgeline length” and should be about a foot less than the actual length of the hammock.
- Never hang your hammock more than 18 inches above the ground. Hanging your hammock too high is dangerous and creates the risk of serious injury. Even if you set everything up correctly, there’s always a possibility of falling out in the middle of the night, so be smart and stay safe!
After just a few times setting up your hammock, you’ll have mastered this simple, useful skill. While your camping buddies are still struggling with tent poles, you’ll be resting comfortably in your camping hammock!


